Make My Pond Bigger: The Guide to Pond Expansion
Do you ever look at your pond and think, "I wish it were bigger"? It's not uncommon for pond owners to seek the opportunity to add on to their backyard oasis. When building a pond, the hole you dig always seems bigger than the final product. After you add the liner and plants, your pond may seem smaller than what you initially wanted. Expanding your pond allows you to add more fish, plants, and water features to create a truly stunning focal point for your yard.
Plan it out
Before you break ground on your pond expansion, take a moment to come up with a plan.
- Map out your new pond size, including any new water features like waterfalls. Are you making your pond deeper? Wider? Longer? You can use paper to sketch out ideas, but be sure to measure the actual site, too.
- Upgrade your equipment. Calculate the new volume of your pond and make sure your pump and filtration system can handle the additional volume. You may need to upgrade your pump or filter. Don't forget a liner for your new dimensions! Read more about selecting pond products.
- Set up a temporary home for your fish and plants. A storage tank will work well for this. It should be large enough so that your fish aren't too crowded. If your tank is shallow, you can use a pond net to make sure no fish jump out. They will require a pump or aerator for oxygen.
How to make your pond bigger
Step 1: Relocation
Gently remove fish and plants and place them in the holding tank with water from your pond and a pump or aerator. Remove any decor.
Step 2: Drain & Clean
You can use your existing pond pump to discharge the water from your pond, just as you would if you had to drain it for winter. Once empty, remove all equipment and water features. This is a great time to clean out sludge or algae, and inspect and clean equipment.
TIP: Pond water is great for gardens!
Step 3: Remove liner
You'll need to remove your pond liner before you can start expanding your pond.
TIP: Clean & store the old liner in your shed or garage in case you want to add a waterfall or stream later on, or even for an above ground water feature.
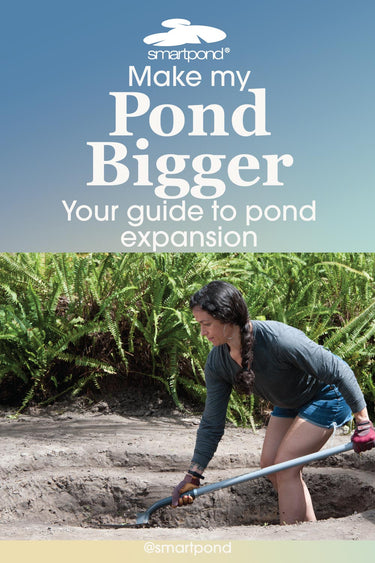
Step 4: Start digging
Think about whether you want to make your pond deeper or just expand the perimeter. Keep in mind once you add the liner, water, and plants it will look smaller than the hole you've dug.
Try to keep the bottom as level as you can; this makes it easier to lay down the liner and prevent wrinkling or folding, which can trap bacteria and algae. Tamping the edges can help prevent erosion.
Step 5: Lay the foundation
When the new hole is ready, lay down the liner as flat as possible, smoothing as you go. and let it extend at least 12 inches over the edge.
Step 6: Secure the liner
You'll want to keep the liner in place by using landscape stones around the perimeter of the pond. Make sure to smooth out any wrinkles.
Step 7: Fill halfway
Fill your pond halfway; this will help smooth out any wrinkles and let the liner form to the edges. You'll need to use Chlorine Remover to help treat the water before reintroducing your pond life.
Step 8: Set up equipment
Add your pond equipment and start running it. You may also want to add biological filtration to help cultivate beneficial bacteria in the water. This can help you avoid new pond syndrome algae blooms.
Step 9: Finish filling
Finish filling your pond with water.
Step 10: Test your water
You'll want to test the water before adding your fish back into the pond. Make sure that there are no contaminants from the tap water.
Step 11: Add fish and plants
Once you've tested the water, you can add your fish and plants back into the pond. They may take a few days to adjust from the stress.
Bonus!
Here are step-by-step project details on how to upgrade your pond with a waterfall.
Limited on space? No problem! These are some options to make your pond appear larger:
The Takeaway
Expanding your pond can be a rewarding project that allows you to really get creative with your water feature. With careful planning and a little elbow grease, you can transform your backyard into a custom aquatic oasis! So, grab your shovel, unleash your creativity, and get ready to create the pond of your dreams!